Organising Seeds…

DSC_0028I’ve been using my two trusty seeds boxes for years.  I’ve talked about them before and I love the sturdy monthly tabs and the fact that they neatly fit two standard size packets of seeds side by side. I use one box for flower seeds and one for vegetables.

DSC_0019

The problem is that for vegetables seeds I simply have too many, plus lots come in larger packets (eg peas and beans), so things spill over into whatever is handy, in the case above, an old egg box lid.

DSC_0029

Now that the wonderful Ocado deliver all sorts, apart from food, I decided to take advantage and buy a new, larger, tin made by Burgon & Ball.  It’s great as all my seeds fit inside.  I may upgrade the monthly separator tabs as they are a bit flimsy (I’ll cut my own from thicker card, or re-enforce the ones included) but it does the job nicely and stops my extra seed piles from taking over the kitchen.

DSC_0015

On a separate note, the flower seedlings arrived from Sarah Raven at the weekend, and have been planted out.  I have no room to pot them up in the greenhouse and they were quite a good size so they’ve gone into the ground direct.  We had lovely sun all weekend and today rain, which is almost a blessing, as I wont have to worry about them drying out.

On the whole, it’s looking promising out there, I just hope the wood pigeons, slugs and mice stay away, I will be heartbroken to find all the hard work munched.

Peas and Pests…

Grrr, my attempt at getting the peas started has failed again.

DSC_0015

After the pesky mice ate the ones planted direct in the garden, then those in the greenhouse, I tried the next lot indoors in a gutter.  Two, yes just two out of a good one meter length have grown.  I am not very happy.

DSC_0023

So here we go again, this time with some ‘stunning, delicious!’ purple mangetout.  I am determined to keep them moist and warm.  They are on the kitchen table, the sunniest and warmest spot.  My husband will be pleased.

Also indoors and waiting to be planted out are:

  • Sweetcorn ‘Lapwing’
  • Courgette ‘ Black Forest’
  • Courgette ‘ Zephyr’
  • Cucumber ‘Burpless Tasty Green’
  • Cucumber ‘Tiffany’
  • Cucumber ‘ Cucino’
  • Melon ‘Edonis’

All the above (apart from the corn, which will be planted direct) are waiting for me to go buy soil.  I hate buying soil, I’ve reduced it right down this year by planting as much as possible in already filled pots jazzed up with some natural fertilizer, but I have so many pests and diseases (carrot root fly, blight etc) that some things do need new soil each year and freshly cleaned pots.

In the greenhouse I now have tomatoes, peppers, chillies and aubergines happily growing and not a lot of room for anything else.  I do plan to squeeze the melons and cucumbers in there though.

OK, best go buy that soil 🙂

Cut Flowers….or Lack of Them…and Wild Flowers…

Sadly, the flower seeds I planted back in late April have done diddly squat.

amethyst-sapphire-cut-flower-bunch_3

In desperation, and because Sarah Raven has an offer on at the moment (ends this Monday, so be quick!), I’ve treated myself to some seedlings.  We are super busy at the moment, and I can’t bare another year without anything decent to cut; to be fair, there is always something from the big border, at least, but I want pretty flowers in the raised beds this year, to brighten up the vegetable patch.

I’ve gone for the Amethyst and Sapphire Mix, which contains:

  • Anchusa ‘Blue Angel’ (Alkinet)
  • Centaurea ‘Blue Boy’ (Cornflower)
  • Verbena bonariensis
  • Salvia viridis ‘Blue’ (Blue Clary)
 dark-cosmos-collection_3
The Dark Cosmos Mix,
chrysanthemum-jewel-collection
and the Chrysanthemum Jewel Collection:

  • Chrysanthemum ‘Blenda Purple’
  • Chrysanthemum ‘Bella Orange’
  • Chrysanthemum ‘Bruno Bronze’
  • Chrysanthemum ‘Littleton Red’
  • Chrysanthemum ‘Smokey Purple’
  • Chrysanthemum ‘Payton Blaze Red’

Clearly these images are from the Sarah Raven website, I’m hoping that’s OK (let me know if it’s not, anyone from the SR team), but as always, I think it’s easier for me to understand the flowers from images and not necessarily the names.  I do know many plant names, but certainly not the subtle colour differences within the variety, so I often email myself the plant order details, with an attached image when I buy something for easy reference.

DSC_0024

DSC_0026

Some wild flower plugs I ordered from Thompson & Morgan have arrived, they are going to have to be planted up in a tray whilst I wait for the moss killer to do its stuff.  I also bought some wild flower seeds, ready to try to create a little meadow patch in the lawn – we’re really going for it this year (or am I trying to avoid mowing some of our half-acre?!).

DSC_0018

The side border is looking splendid as the alliums begin to open.  Shame about the rabbit fence! I’m kicking myself for not taking week by week photos of how things have developed so far here this year, as it would be a good record of my attempt at successional planting.  The top border is looking very green but not a lot else.  I must add new bulbs, especially alliums, in September.

DSC_0004

Finally, we have big plans for the garden, we’ve just decided to tidy the entire of the road side edge.  This is a HUGE undertaking, as it’s riddled with self sewn saplings, ivy climbing everywhere, a low crumbling wall on the far side and many brambles.   It’s also the border to quite a busy rat-run road, so we plan to cut everything back and put a fence along the edge.  Although the huge fir trees mean our garden is very private, it’ll be nice to know it’s also secure.  We then plan to cut all the lower branches off the firs to give quite a lot of new floor space, I hope to plant more bluebells (I put a few in years ago), wild garlic and maybe some wood anemone to create a mini woodland area for the boys to play in.

Oh it’s going to look so pretty, given time and quite a bit of money, but it’ll be worth it 🙂

Sunday Lunch…

I started this post ages ago, it was originally written to go with the Easter lunch that I cooked for family and friends but I completely forgot to take any photos,  so it’s been sitting on my dashboard since.  We’ve just had a lovely weekend with friends, as part of which I cooked roast chicken, again (with all the trimmings), I also repeated some of my regular canapes, and this time, remembered to reach for the camera, so I thought I’d update and publish the post.

spring flowers

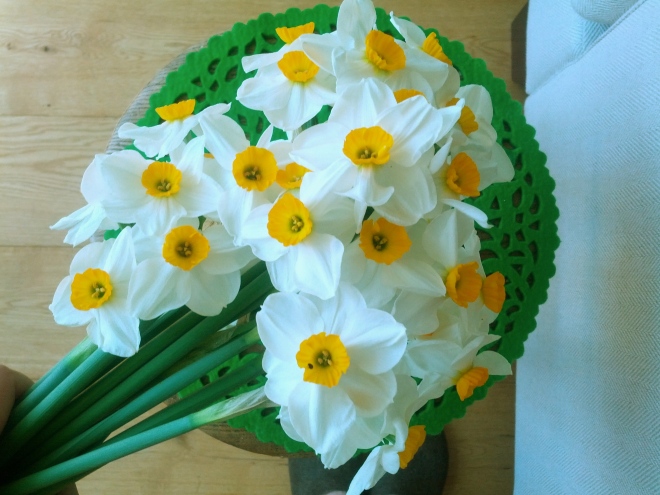
Oh, and I’ve been cutting lots of Narcissi ‘Geranium’, which I grow in the cutting patch, it’s my absolute favourite, with it’s beautiful multi-headed stems and the smell that fills the room from one small bunch is amazing.

dog and spring flowers(I am love with this kitsch dog, that came from Mum’s, my other half HATES it, oh and the colourful things around it are my youngest’s many painted clay artworks from school….I have no idea what any of them are meant to be!)

Below is the post from Easter lunch:

I like to make or prepare as much of a big roast lunch in advance, so I can enjoy the day itself, and that includes the canapes.  On the Saturday, I made Delia’s ‘Tiny Cheese, Onion and Olive Scones’ (recipe here on her site), only minus the olives as I couldn’t remember if both boys eat them.  I’ve made these before but with a larger cutter then suggested, this time, I used a small shot glass to get the 3cm length scones and they were much better, more delicate to eat.  On the Sunday, I warmed them through for a few minutes then served them split with cream cheese mixed with fresh-cut chives.

DSC_0028

I also made ‘Smoked Salmon Frittatas’, the recipe for which is adapted from a small booklet I once got with a magazine.  We have this thing (my Sister and I) that we always have salmon blinis as a canape, at pretty much every opportunity, but my husband is on a no grain diet so I needed another option and made frittatas instead.  I used this fab mini tart pan that I bought ages ago, it’s very heavy duty and super non-stick.  I love it.  I have, though, in the past made larger versions in regular tart pans (it makes 12 normal sized ones, or 24 minis).

Smoked Salmon Frittatas

100g Smoked Salmon, chopped

2tbls chopped dill or chives

freshly ground pepper

100ml double cream

2 eggs (medium)

For the garnish, some creme fraiche , lemon and a few snips of herbs

Also, you’ll need a mini tart tin, or a regular 12 hole muffin/tart tin

Method

Set the oven to 180 degrees C (350 F, Gas 4)

Mix the chopped salmon and herbs together.  

Grease your tart tin (I use olive oil and rub a little into each, using my finger) then share the salmon/herb mix into the bottom of the tart tray.

Lightly beat the cream, eggs and pepper together, then pour evenly into the tray (I use a jug).

Bake for about 10-15 mins for the small frittatas, or 20-25mins for larger ones, in the centre of the oven until set.  They go lovely and puffy and slightly golden on top.

Remove and cool in the tin for 5mins.  They will sink a bit, but they’ll still be pretty.  

Remove from the tin and cool on a rack.  

At this point, once cooled, you can store them on a plate, covered in cling film, in the fridge overnight.  The next day, make sure they have returned to room temperature before garnishing and serving.  To serve, each mini frittata is topped with a blog of creme fraiche, a very thin, small slice of lemon (or not in the photo below!) and a snippet of herb.

DSC_0031

For lunch itself on both Easter and this last weekend, I went for chicken.  I’ve posted my favourite bits of cooking a roast bird before, for me it’s all about the trimmings, there are certain things that my family ALWAYS have when cooking a bird, one is Gran’s stuffing balls recipe, found in this post and another is bread sauce.   My boys wont eat bread sauce…..I’m thinking of disowning them 😉

I don’t normally make Yorkshire Pudding with chicken, but the boys are huge fans so I thought I’d hunt for the ‘best ever’ recipe, just to see if it was better then normal (my Yorkshires are a bit hit or miss, I’m embarrassed to admit).  I opted for this version, it was a bit heavy in the centre, due to the oven temperature being too low, but the taste was lovely so I’ve written it out into my recipe book for future use.

I do love a full roast and I’ve really enjoyed bringing out all my ‘proper’ dinner things recently, my Royal Doulton ‘Coppice’ crockery has been used  a lot, along with all the farmhouse style silver and bone handle knives that I own, as well as the vintage table linen and napkins.  We don’t use them every weekend (they have to be hand washed to keep them in good condition) but it’s important to me that they do get used and don’t just sit in a cupboard.

I’ve been planting lots of seeds, more next time 🙂

Progress…

I wish I had glorious photos for you today, sadly I don’t, as I have been too busy doing and mostly forgot to take any, plus it’s been very bright here (I KNOW, it’s a miracle) and it’s so hard to take good pictures with such harsh shadows.

I’ve spent quite a lot of time in the garden, finally getting on with those jobs that I’ve been hoping the garden fairy will do for me.  There isn’t a garden fairy, that would be me then.

DSC_0030

First up was sorting out the border between us and the neighbours.  When we moved here, six years ago there was no fence, well there was a very shabby chicken wire number that could be stepped over on old, rotten posts.  After some resistance, the neighbours eventually put up a wooden fence similar to the one on their other side; I think, that after years of having a nice view over an empty garden and woodland, they realised seeing my kids running around in pants (my boys favourite summer look) and a messy lawn strewn with plastic toys wasn’t quite the same and a little privacy was best for all.  I planted shrubs, bulbs, climbing roses and hellebores along the length, in the hope of creating a nice green border with some interest on our side.  It’s never really taken off and I stupidly didn’t think about how it would be impossible to mow the grass between the plants, so it ends up looking very scruffy by mid summer.

home_gb

As a solution, I decided to edge the border, using Smartedge.  This is obviously their promo image but shows nicely what the product is and I’ve linked to their site, although you can buy it all over the place.

DSC_0045

It’s quite expensive and it took me a long time to dig in the first 5 meter length, with a deep enough edge to slip the plastic into place, before then digging over all the ground behind to remove the grass.  I’ve pinned down the A frame, so the grass can grow through and we can mow over it.  I love this idea, as with a third of an acre to mow, anything that makes the job easier is great.

DSC_0033

I had this little fella for company (sorry about the bad photo but I just wanted to leave him in peace to head back into the long grass).  We get a lot of slow worms that come through from the wooded area at the bottom of the garden, they like to sunbathe under our bay window.

DSC_0043

Having gone back out today, I am happy the expense of the edging is worth it.  I think this is going to look great and will be so much easier to maintain.  For this year, I’m leaving it as is, I plan to add bulbs in the Autumn (muscari, some small narcissus and maybe some fritillaria, just because I love them so) and then to cover the soil in wood chippings, in a hope to keep the weeds down.

On a totally separate note, can you see all the moss in our lawn?  It reached epic proportions last year, we can no longer mow easily (the mower gets stuck on the moss, which is higher and denser than the grass) and it has got ridiculously lumpy, it’s like stepping on a sponge, so I’m afraid we’ve decided to kill it.  The tipping point was a  number of our neighbours standing around looking at it and declaring they’d never seen such a bad moss problem, ever (one being a gardener for a living).  I am in no need of a perfect lawn, ours will never be that and I’ll be sad to see all the little weeds go (that I rather like) but the nasty smelling death to moss stuff has been applied and with quite a lot of work it should be more grass than moss, by the end of the year.  I hope so anyway.

DSC_0048

I’ve also decided to rabbit proof the garden.  The side border is looking rather beautiful, with all the recent planting paying off, only it’s still protected by wire, which rather takes the joy out of things.  I will remove it in coming weeks, but I really need to next plant stage to be firmly established before I do, so the rabbits don’t chomp away at the sweet, new shoots.

I am going to change my surname to Mc Gregor 😉

PS, I’m sure it goes without saying, but the opinions of Smartedge are just my own and clearly, I didn’t get any free for writing this post.